Home › Styles › Camera settings frame
How to add a camera settings (EXIF) frame to your photos
A camera settings frame is a border, usually white, that prints the photo's shooting details under it: lens, aperture such as ƒ/1.8, shutter speed, ISO and date. The details come from the photo's EXIF data, so use the original file rather than a screenshot, pick a frame layout, check the values, and remove location data before you share.
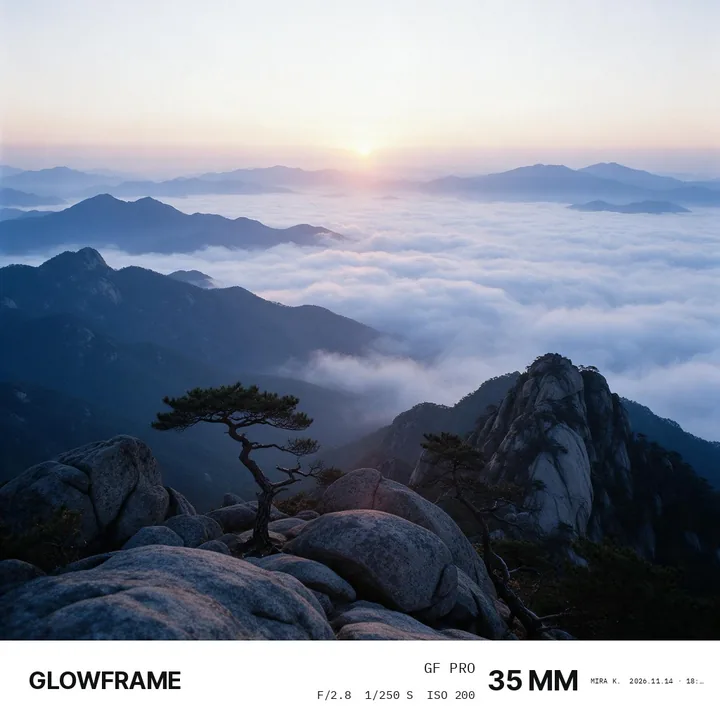
Step by step
You need: An original photo with EXIF data (not a screenshot), A frame app that reads EXIF.
- Start from the original photo. Screenshots and some messaging apps strip EXIF data. Use the photo from your camera roll or the original file from your camera.
- Choose a frame layout. Pick where the details sit: a bar under the photo, a film-strip edge, or a caption like a gallery label.
- Check the values. The frame reads aperture, shutter speed, ISO, focal length and date from EXIF. Correct anything missing, such as a manual lens that does not report its aperture.
- Remove what should stay private. Before sharing, remove GPS location and camera serial numbers from the exported file unless you want them public.
- Export for where you post. Choose a crop for the platform, such as 4:5 or 9:16, and a long edge such as 2048 pixels.
Common questions
Why does my frame show no camera settings?
The photo has no EXIF data, usually because it is a screenshot or was saved from a messaging app. Use the original file.
Is it safe to share photos with EXIF data?
EXIF can include your GPS location and your camera's serial number. Remove both before sharing unless you mean to show them.
Can I show a camera brand's logo on the frame?
Camera brand logos are trademarks. GlowFrame frames show the settings as text, with no logo, the GlowFrame mark or a logo image of your own.
GlowFrame reads EXIF from photos, RAW files and Live Photos and removes GPS and camera serials on export unless you keep them. Find out more →
Updated 19 November 2026.